
I have had some questions about how I wrap gifts so I created this post to show you my process for making bows. Bows made this way have a few advantages to buying regular wrapping bows:
It is cheaper. By not buying bows and making your own you spend less money wrapping gifts.
It uses excess wrapping paper. There is always always always excess scraps of wrapping paper and this helps use them up.
And the BEST advantage with these bows is they travel and ship better than regular bows. These bows can lay flat and the gifts can be stacked for shipping or traveling and are pretty durable. They can be poofed-up on arrival to their destination or just left flat and still look great!
Below is a clip of me showing how these gifts can be stacked and the bows still look great!
I usually make my bows out of parchment paper and wrapping paper. Parchment paper is stronger and more durable than most wrapping paper. I usually have a roll of parchment paper on hand. You can get a roll of parchment for $1 at the dollar store and it goes with almost any wrapping paper for any occasion.

You can see the parchment paper goes with all three of the different gift wrap patterns I bought this year.
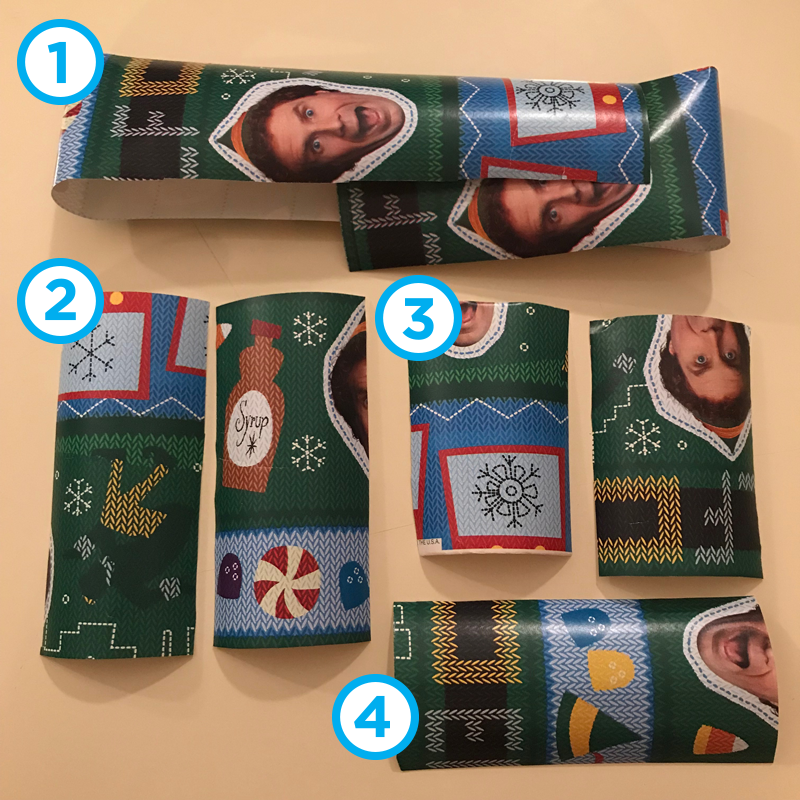
I usually cut two long strips of parchment paper to create the parts. One of the strips stays in tact and the other gets cut into parts. To make my bows I make 4 types of standard parts:
One long strip of paper is used to simulate the bow being tied around the gift.
I make two parts that are going to be the loops of the bows.
I make two parts that are going to be the tails of the bow.
I make one part that is going to be the center of the bow.

I don’t really measure the parts out but the lengths tend to be in these similar proportions.
I fold the paper instead of cutting to create the bow shapes. This helps with durability and also creates the illusion of a tied bow while still remaining completely flat. I also do ‘v’ cuts at the ends of the bow tails. The folds at the end of the bow parts should roughly be the same width of the strip that goes around the box and the center of the bow.

These are what the back sides of all the parts look like.
Here is how the bow parts look when flipped over to create the final bow. I use glue to fasten all parts of the bow together, not tape.

You can see the bow layout more clearly now.
Here is the final basic bow. It can be assembled with or without the tails.

Then if you feel like making the bow a bit more fancy you can use up some extra wrapping paper to make the bow more elaborate.
One long strip of paper is used to accent the main strip that simulates the bow being tied around the gift.
I make two parts that are going to be accents for the loops of the bows. These accents look almost exactly like the accents for the tails this time. They sit on top of the loops.
I make two parts that are going to be accents for the tails of the bow.
I make one part that is going to be an accent for the center of the bow.
The parts are almost the same as before.

Notice the variations from the first bow created.
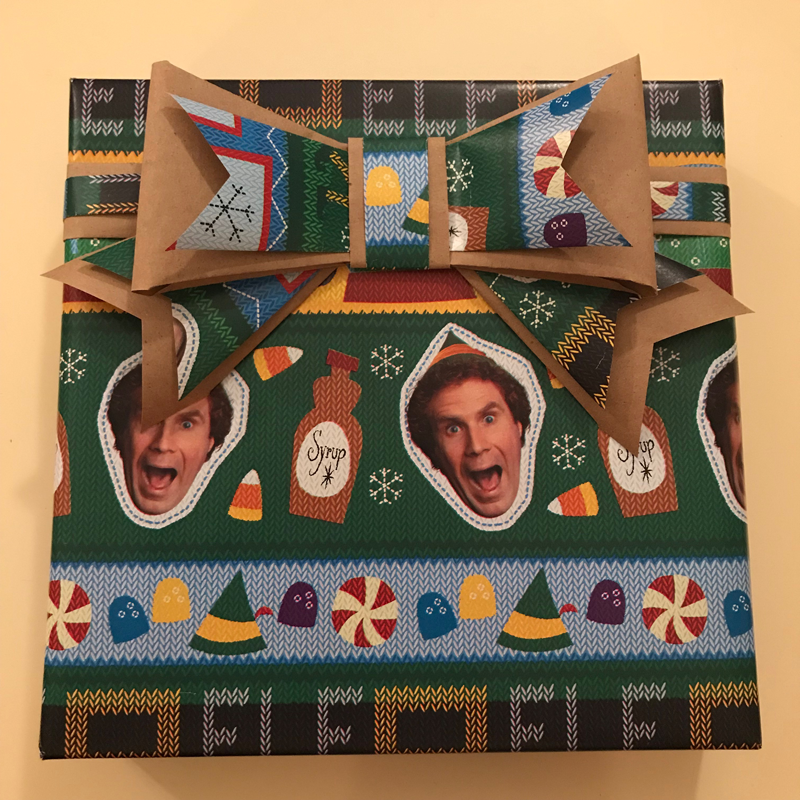
The final with the fanciest bow!
I love wrapping gifts. In fact, I nerdily love doing it! These bows take a bit longer to make but if you don’t mind spending a bit more time you can also have beautiful bows that travel and ship well!